How to Install a Ceiling Medallion
Last Updated on December 3, 2024
After purchasing a ceiling medallion and this modern Serge Mouille lighting months ago, we finally installed this architectural beauty. You may have caught a few glimpses of this DIY on Instagram Stories, but if you missed it, here is the full tutorial on how to install a ceiling medallion in all its glory, including the final reveal, which wound up looking killer cool. I’m obsessed with the mix of the traditional molding with the modern light in our bedroom (which now looks completely different with its black textured wallpaper).
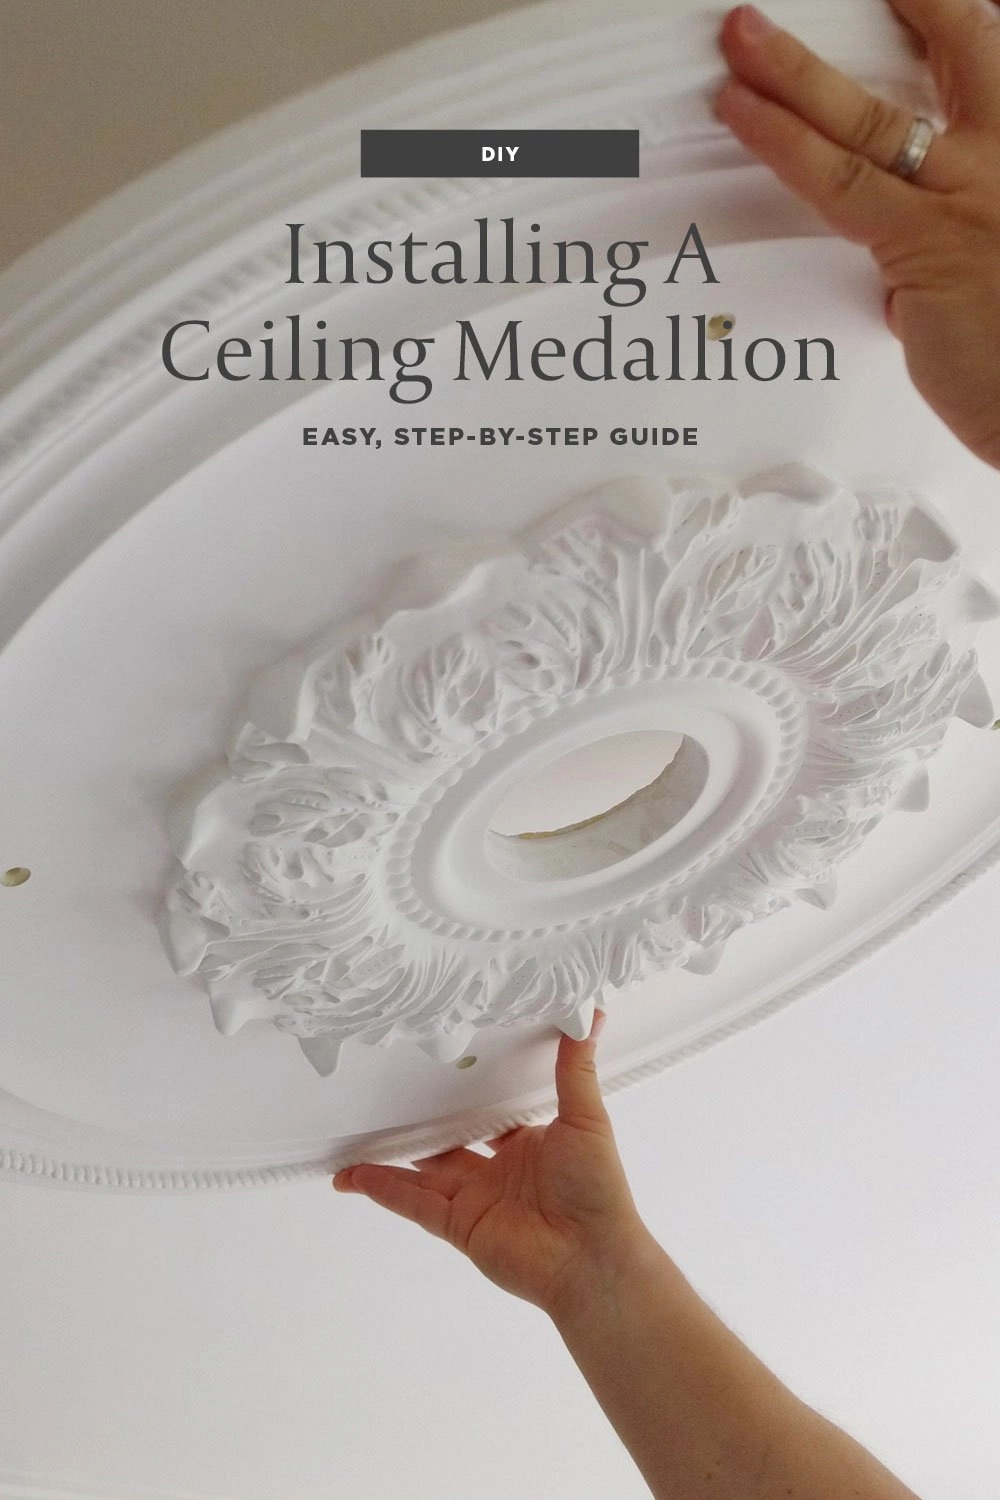
Upon opening the medallion’s box, The Boy said, “I am loathing this home improvement project already. I’m envisioning much cursing, sweating, and a trip or 7 to Home Depot in my near future.” Not quite. There was 1 trip to Home Depot, and some sweat was involved. There was also a “please, please, pretty please with sugar on top” uttered which is how we curse in front of our small children, so one could argue there was foul language. All in all, it was surprisingly easy to hang.
Table of Contents
Materials Needed To Easily Install A Ceiling Medallion Yourself
Ceiling Medallion — full round-up of the best ceiling medallions. Also, if you are looking for new light fixtures or boob light alternatives, click on one of those links.
Cordless Drill with Countersink Bit
Can I just say how relieved we were to find it was made of polyurethane foam and had a plaster-like coating? This is not the DIY for you if you have a real plaster ceiling medallion. Plaster is too heavy for Liquid Nails, and the medallion will fall and smash into a thousand pieces.
Ours arrived with a pre-made center hole large enough to accommodate the junction box. Phew! Use a drywall saw if yours needs to be larger or the hole needs to be cut.
9 Simple Steps To Install A Ceiling Medallion
1. Shut Off The Electricity
Turn off the power. We often only turn the light switch off but flip the fuse on your breaker if you want to be extra safe. No one needs to be getting zapped for a ceiling medallion.
2. Remove The Old Light
Remove the old light fixture and definitely find a good boob light alternative.
3. Double Check That Electricity
Use an electrical tester on the wires to ensure the electricity is off. We have some glitchy electrical in the new house, and even though the fuse box says the electricity is off, some junction boxes still have current flowing through them. If you find mysteries like this in your home, be sure to label them in the fuse box for future projects.
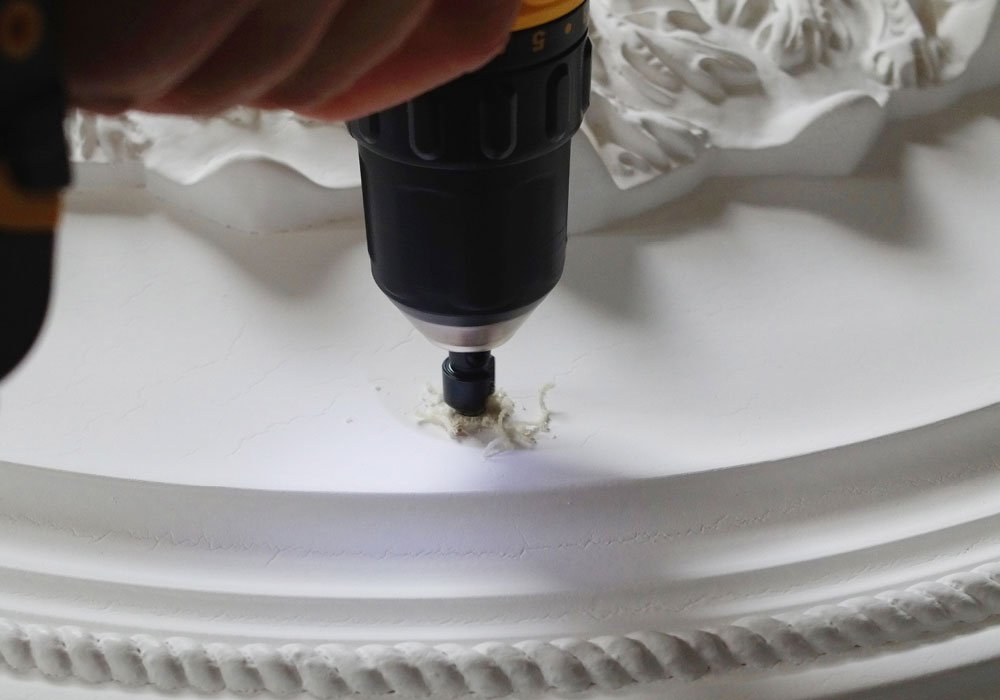
4. Sink Your Pilot Holes
Once you are positive, the electrical is off, try to fit the ceiling medallion by pressing it against the ceiling. It may not lie perfectly flat, but that is okay. The white caulk will fill in any gaps.
If you have a large ceiling medallion like mine, you may want to consider drilling 2-4 pilot holes (be sure to drill deep enough to countersink the screw heads as you will spackle over them later).
5. Apply The Liquid Nails
Carefully place the ceiling medallion on a flat surface (one that can get dirty), and apply a generous bead of Liquid Nails to the reverse side.

PRO TIP: Have a damp paper towel or ten nearby. You’ll need them to clean the tip of the tube. Once the Liquid Nails start to flow, it takes a few seconds for the glue to stop.
6. Stick It To The Ceiling
Center the hole of the ceiling medallion over the electrical box and press firmly.
7. Screw Those Pilot Holes
Now, remember those pilot holes? Take your drill and install a construction screw into each hole. See, no holding your arms above your head for hours while waiting for the adhesive to dry. If your medallion is small, this step is probably not needed.
8. Install Your Ceiling Light
Install your bedroom lighting. For safety’s sake, use that electrical tester again on the wires to ensure the electricity is off.
Badda Bing! Badda Boom! Now you’re a pro and know how to install a ceiling medallion! Once the light is attached, turn the electricity back on and flip that light switch.
How To Fix A Ceiling Medallion With A Gap
Hopefully, this is your moment to shine. For us, we had a slight DIY fail. When we stuffed the wires back into the ceiling like a turkey, they came undone. Whomp, whomp. We had to uninstall the lighting, rewire, and reinstall once, twice, three times a lady. So, word to the wise, take your time shoving all that wiring into the junction box. Before we wrap up this installation, Imma give one more step.
Our medallion didn’t sit completely flush with the ceiling’s surface (that’s normal). Remember that white caulk? Grab the caulk gun (be sure to swap out the tube of Liquid Nails, or your finger will be stuck to the ceiling).
9. Time To Caulk The Gap
Hold the tube at a 45-degree angle, and pull the caulk gun along the edge of the ceiling medallion. Again, you may want some damp paper towels to clean the tip. Use your finger to pass over the entire bead of caulk, pushing it into the gap. This should be one smooth, continuous movement.
I know I said that was the last step, but the devil is in the details. If you screwed your medallion to the ceiling, you’ll want to cover those holes with some spackle. Ta-da! You’re done! Why we were so intimidated by this ceiling medallion DIY is beyond me. It was easy and simple.
Most importantly, I’m in love with the result. We’re keeping ours white for now, but I’ve seen some painted in bold colors that look incredible! If you decide to paint, wait until the adhesive, caulk, and spackle are completely dry.
I’ve received a few messages about my rug. You can find it here. I no longer have this blue velvet wingback headboard and bed frame, but it is still available. You can see how this bedroom has transformed with a new ivory panel bed here, and then we installed the Philip Jefferies Broadstrokes black textured wallpaper here.
Installing a ceiling medallion is an unexpected home decor idea that elevates the design of your space in a budget-friendly way.
Discover More Home Decor Ideas and Inspiration
I wallpapered a closet myself. Here are my tips for beginners How To Wallpaper 101
Modern Kitchen Makeover On A Budget can it be done? Ummmm, yes, it can. Here’s the final reveal.
When the basement flooded, we installed Luxury Vinyl Flooring from Karndeen.
The Bathroom Makeover – Potty Paradise check out the final reveal of the One Room Challenge.
An in-depth look at How To Choose Upholstery Fabric to upcycle outdated furniture.
Check out this round-up of modern ceiling lights.