Last Updated on December 6, 2024
Have you ever shopped for artificial flower arrangements in water only to see they cost a million dollars? Ok, maybe not a million, but those fake flowers in resin can cost a pretty penny. Remember when I shared the how-to DIY Marble Dipped Mugs with nail polish tutorial? That craft legit broke the internet. So what if I told you I figured out how to make artificial flower arrangements in resin for a fraction of the cost? Ya, the ones with the fake-looking water. Let’s start mixing and saving money by creating our DIY faux flowers in resin!
Table of Contents
Create An Artificial Flower Arrangement In Resin

If you’ve been on TikTok, you’ve probably scrolled through many resin DIYs. Trays, molds, tables, and pours in every color of the rainbow, but most resin pours were shallow – an inch thick or less. Many were only a resin coating. How thick could a resin pour be? 3 inches? or 5 inches? Will heating the resin break a glass vase? Let me tell you: much research was done before jumping into this DIY.
Materials Needed To Create Your Arrangement
Glass Vase
Faux Florals
Wire Cutter
Resin – or Liquid Glass (more expensive but higher quality)
Tarp
Level
Old Bucket or Container
2 Measuring Cups
Gloves
Wooden Mixing Stick For Paint
(or plastic mixer for drill – depends on how much resin you’ll be mixing)
Heat Gun
To help keep this DIY affordable, I picked up a glass vase from my local thrift shop. If you do the same, be sure to watch for chips, cracks, or surface scratches. The large cylinder vase was $7 (the blue tag was 50% off day and cost me $3.50), but if you don’t have the patience for a thrift, you can always find new glass vases here. They’ll run you anywhere from $6 – $17, depending on the size.

Save Money on Fresh Cut Flowers By Creating a DIY Artificial Flower Arrangement
Most of my faux florals are purchased from Michael’s Craft Store. They have a great selection at a great price, and if you shop their end-of-the-season sales, you’ll find most faux stems deeply discounted. Of course, I would not be your virtual BFF if I didn’t remind you to check their site for the handy dandy 20% off coupon. Affordable DIYs are the best DIYs, am I right?
The faux hydrangeas in the next arrangement were $10 a stem, but fall florals were on sale for 50% off, bringing that price down to $5 a stem, and the 20% off my purchase brought them down to $4/stem. Shazam!
What I bought vs. what I made.
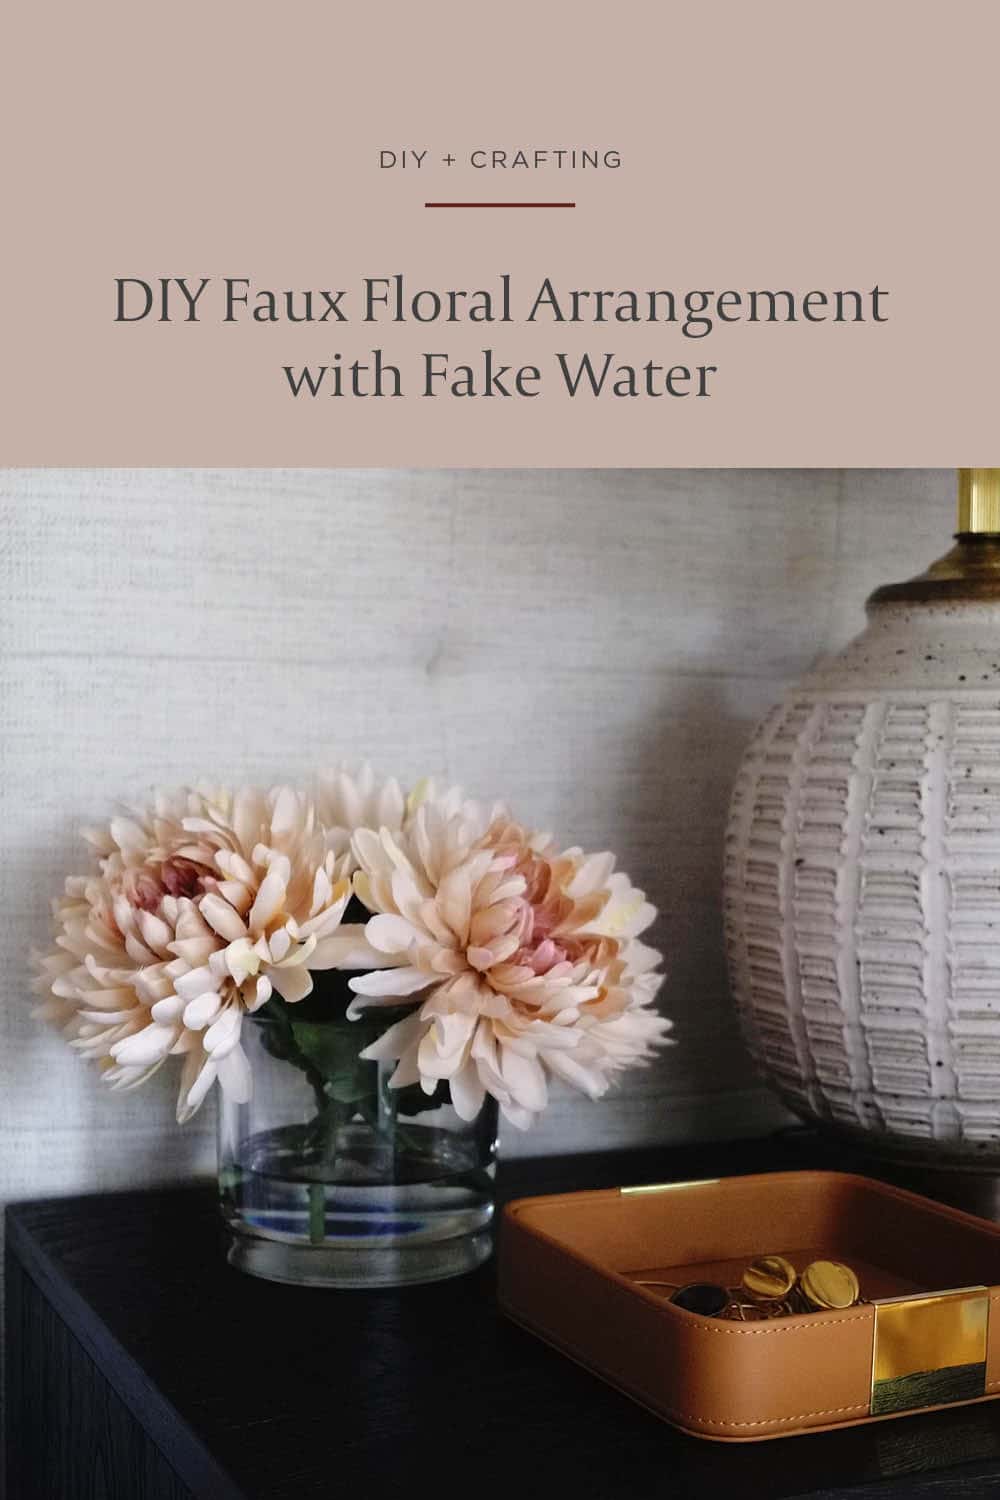
The blush mum artificial flowers in the next arrangement were originally priced at $5 a stem, but the final sale price with the coupon was $2 a stem. I used 5 stems for a grand total of $10 plus my vase.
Now let’s chat resin cost — because that is where this DIY can add up. It was not cheap. If you scroll down and read the common resin mistakes and advice on avoiding them below, you’ll see why my first batch of resin was cloudy and full of bubbles. In short, my room temperature was too cold, and the less expensive resin would have been clearer had I warmed things up a bit.
Again, check out the common beginner resin mistakes, FAQs, and tips on avoiding bubbles in your resin at the very bottom of this post. Hopefully, this insider advice can help you avoid the headache of bubbles and cloudy resin mixtures I encountered. If your resin looks like the above image after mixing, start over in a warmer room. Your resin is too cold.
After mixing the first batch, I researched different resin brands and decided to check out this deep pour resin that was pretty much a no-fail when it came to bubbles, but it was pricier. You’re going to have to decide how much you want to invest. My first batch was cloudy due to temperature; however, I went with the more expensive brand because I wanted more than a 2″ pour for the hydrangeas.
Instructions On How To DIY This Artificial Flower Arrangement In Resin
1. Clean everything. Rinse out all your containers and wipe them all down. You do not want to see dirt and dust particles in your crystal-clear resin water.
2. Play with your artificial flower arrangement before mixing resin. You want a plan for the end result.
3. Trim stems with wire snips to ensure a clean cut.
4. Lay a tarp on the ground to protect your working surface and place glass vase(s) on it. Check to make sure the vases are level. You do not want your fake resin water to cure at a slant. Shim if necessary (I used folded pieces of paper to get mine perfectly level).
5. Read the directions for your resin and measure precisely. Most are a 1:1 ratio. Liquid Glass is a 2:1 ratio.
6. Before opening the resin and hardener, wear gloves. You do not want this mixture on your skin.
7. Use separate measuring cups to ensure an equal volume of the resin to the hardener.
8. Pour the resin and hardener into an old (clean) bucket or container, depending on the amount of resin you are making.
9. Use a wooden paint stick (container) or plastic mixer with a drill (bucket) and stir. If you are using a drill, mix at a very low speed.
10. Mix small batch for at least 3-5 minutes. Mix a large batch with a drill and mixer attachment for at least 8-10 minutes. Be sure to scrape the sides and bottom.
11. Pour the well-mixed resin into your glass container until you reach the desired fake water level.
12. Don’t freak out. there will be bubbles, but using a heat gun on the resin will help them rise to the top and pop.
13. Watch how hot the mixture and glass get with the heat gun. You do not want your vase to break.
14. Add faux florals and allow 24 hours to cure.
Want to know where that cane coffee table is from? Read my affordable modern home decor round-up. I also rounded up some beautiful cane furniture here!
FAQs — Common Mistakes When Pouring Resin For My Faux Flower Arrangement
The most common mistake a beginner makes is not mixing the resin accurately. You must read the directions and measure precisely. This is why I suggest using disposable measuring cups up above. Most resins are 1:1, but the deep pour Liquid Glass is a 2:1 ratio. Adding too much or not enough resin or hardener will change the chemical reaction. Both liquids must be mixed equally by volume—channel chemistry class.
Troubleshoot Liquid Runny Resin
Resin that doesn’t harden often results from improper ratio mixing, probably due to not having enough hardener added to the resin. You must scrape the gooey mixture off the top before reporting. If you do not scrape all the gooey runny resin off, it’ll leak out and become a complete mess.
Why Is My Resin Sticky?
If your resin feels sticky and tacky, it could be from incorrect measuring, but it’s more likely due to temperature. Ideally, the room or outside temperature should be 77º – 82º. You can try moving your vase indoors or near an elevated heat source.
Soft Spots In Resin
If some portions of the resin pour are cured, but others have soft spots, the resin mixture was probably not mixed thoroughly. My deep pour mixture was mixed with a drill (on low) for about 6-8 minutes, and the smaller pours were hand mixed with a paint stick for about 3-4 minutes. Don’t forget to scrape the sides while mixing because even the smallest amount of disproportion can throw that chemical reaction off.
How To Eliminate Bubbles In Resin
Your resin is going to have bubbles when mixing. There’s no way around that unless you use a pressure pot. But, that being said, there are ways to remove the bubbles from resin and prevent them from popping up in the first place.
Time is the first line of defense. Once the resin is poured from the mixing bucket to the mold or glass vase, the bubbles should rise to the surface and begin to pop on their own. A heat gun or torch is needed if they are not rising on their own. The added heat will force the bubbles to pop before the resin cures, leaving you with a crystal clear finish.
My first crack at a resin pour was in the basement, which was too cold. I could not remove the bubbles, and the entire mixture was cloudy. That milky appearance is from a ton of microbubbles, and adding heat afterward, did nothing to help the sitch. Turn up the heat, go outside on a warm day, or be prepared to scream, “friggin’ bubbles” a lot.
Avoid Dust In Resin
If you want a crystal clear finish, clean and wipe down every surface before you do anything. Nothing is worse than nailing a resin pour only to discover dust particles and dirt floating in the liquid. If something (like a bug) lands on the surface while the resin is curing, it is possible to sand it down and repour. But if you’re pouring this DIY faux floral arrangement into a glass vase and the resin is full of specs of dust, it’s game over. Clean your vase before beginning this faux flowers in resin craft, and wipe down your bucket and mixer. Clean out the measuring cups. Wipe down everything. Canned air is your friend.
Ideas For Decorating With Artificial Plants And More Modern Home Decor Ideas
Best Faux Olive Trees – the new trending plant every designer is decorating with.
The Real Guide To The Best Faux Plants – if you have a black thumb like me, check out how to add greenery without the hassle of being a plant mommy.
Affordable Modern Home Decor – if you’re on a budget but want to refresh your space. Try these tips!
Last but not least, the tried and true plant still stands strong in the interior design world – rounding up the best faux fiddle leaf fig trees.