Last Updated on December 13, 2024
Picture this, the countdown to Christmas is on, and you’re in a panic looking for last-minute DIY gift ideas. It happens to the best of us. In fact, I was in the same boat this morning, but Walmart helped me save the holiday with this unique coffee mug gift idea with a personal touch. If you’re a home design lover, dig a DIY, and don’t have a Cricut machine, pop that sucka onto Santa’s wishlist pronto. For this clever DIY gift idea, I used the Cricut Explore and the Cricut Mug Press. If you’re looking for more holiday gift ideas, be sure to check out my nail polish dipped mugs.
Table of Contents
Easy DIY Gift Idea With A Personal Touch

This post is sponsored by Walmart.
Once the mug is pressed, you can fill them with a personalized gift – ingredients for hot chocolate with a pair of cozy socks, favorite holiday candies with a gift card, or maybe fill it with items for an evening of pampering — add a face mask, hand cream, chocolates, and pretty nail polish. Who knew coffee mugs could be such a unique and personalized gift idea! Oh and if you’re looking to give this as a teacher appreciation gift, fill it with a gift card, colorful pens, and other school supplies.

RELATED: Be sure to check out this beginner’s Cricut project and make this modern kitchen towel.

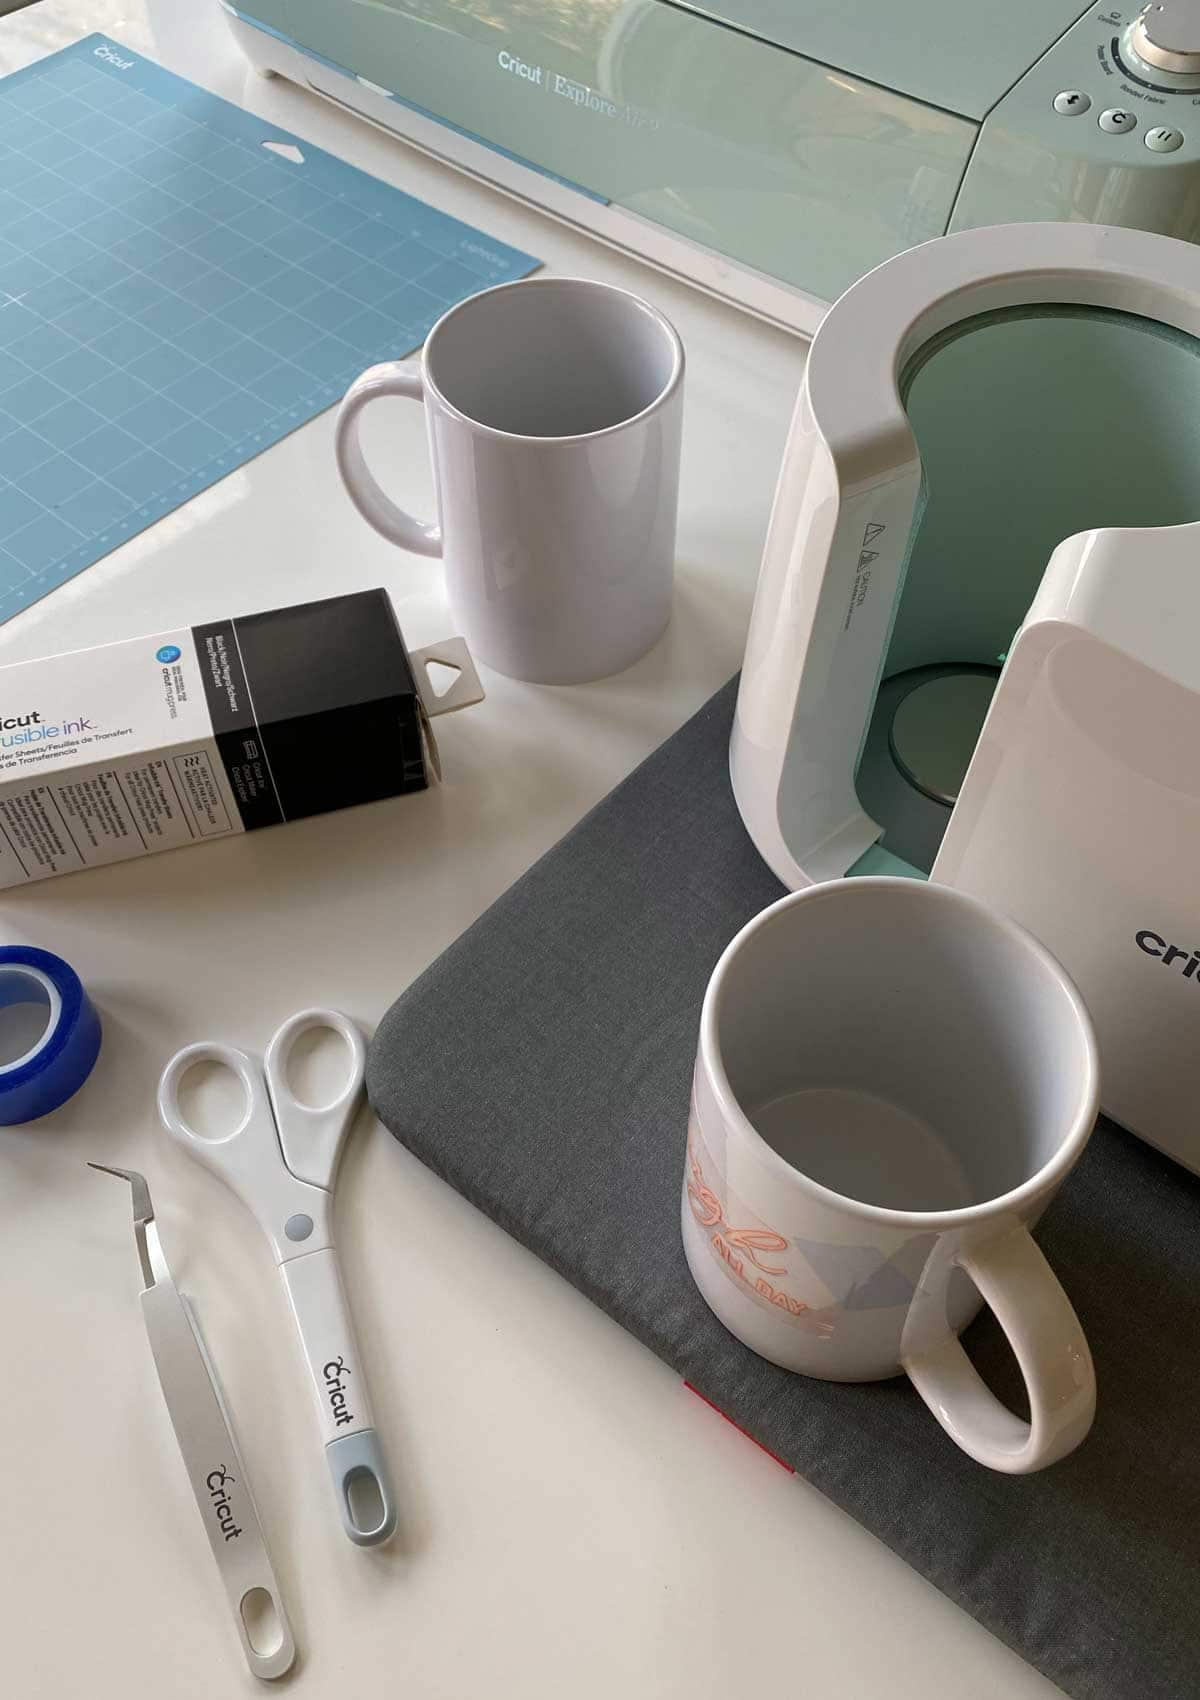
Supplies needed for this coffee mug DIY gift idea
Cricut Cutting Machine (Explore, Maker, Joy)
Cricut Blank Mugs (I used 15 oz mugs)
Heat Resistance Surface (I used the EasyPress Mat, but you can also use a folded towel)
Tweezers
Rubbing Alcohol
Microfiber Cloth or Lint Roller
Heat Resistant Tape (optional)

Mug Press Directions
- Open Cricut Design Space to create a new project.
- Size your design to fit the mug (I measured mine on the mug).
- Cut your Infusible Ink transfer sheet to size and place it on the adhesive cutting mat.
- Click “Make It” and be sure to MIRROR your image prior to cutting – otherwise, your text will read backward.
- Select the material you’re cutting – I needed to set my Cricut Explore to Custom to find the Infusible Ink cutting option.
- Pre-heat your Mug Press and be sure it is on a heat-resistant surface. Leave space to cool your mug.
- Once it’s finished cutting, remove your design from the transfer sheet. I find the tweezers work better than the weeding hook.
- Wipe the surface of your mug with rubbing alcohol and a lint roller.
- Place the design on your mug using heat-resistant tape if it doesn’t stay in place. Just be sure that the tape is not covering the design or the ink transfer may even.
- The Mug Press light should be green.
- Carefully place the mug into the press, holding the handle.
- Press the lever down and wait for the beep. The flashing indicator lights will show you approximately where you are in the process, but there is about a 6-minute wait time.
- The mug press will beep once it is finished. Carefully remove the mug by only touching the handle. IT’S SUPER HOT, so let it cool on a heat-resistant surface.
- Remove the transfer sheet and any heat-resistant tape, and you’re all set!

Cricut Mug Press FAQs and Helpful Hints
Yes, your mug is dishwasher-safe.
Yes, your mug is microwave safe.
They say you can use other mugs, but I recommend using the Cricut blanks.
Rather than centering my handle in the opening of the mug press, I like to shift mine a bit to the left. Helps ensure your design will not move.
Yes, you can also use Infusible Ink Markers.
Do not forget to mirror your design before making it.


Discover More Holiday Inspiration
Find more great gift ideas with the Best Holiday Gift Guide
Try my Great Aunt Idella’s melt in your mouth best spritz cookies.
One of my favorite holiday treat recipes is these Chocolate Peppermint Cookies
Every New Year’s Eve, we break out the bubbly for this delicious champagne smash drink
TikTok has coined “Tacky Trees” as the latest trending holiday decor craze. get all the deets,.
These easy-to-make lemon cherry bars are one of my favorite holiday treats.
Got a special guy in your life? Don’t miss this Holiday Gift Ideas for Him
